Relief Carving: A Step-by-Step Guide for Woodworkers
What is Relief Carving and Why Try It?
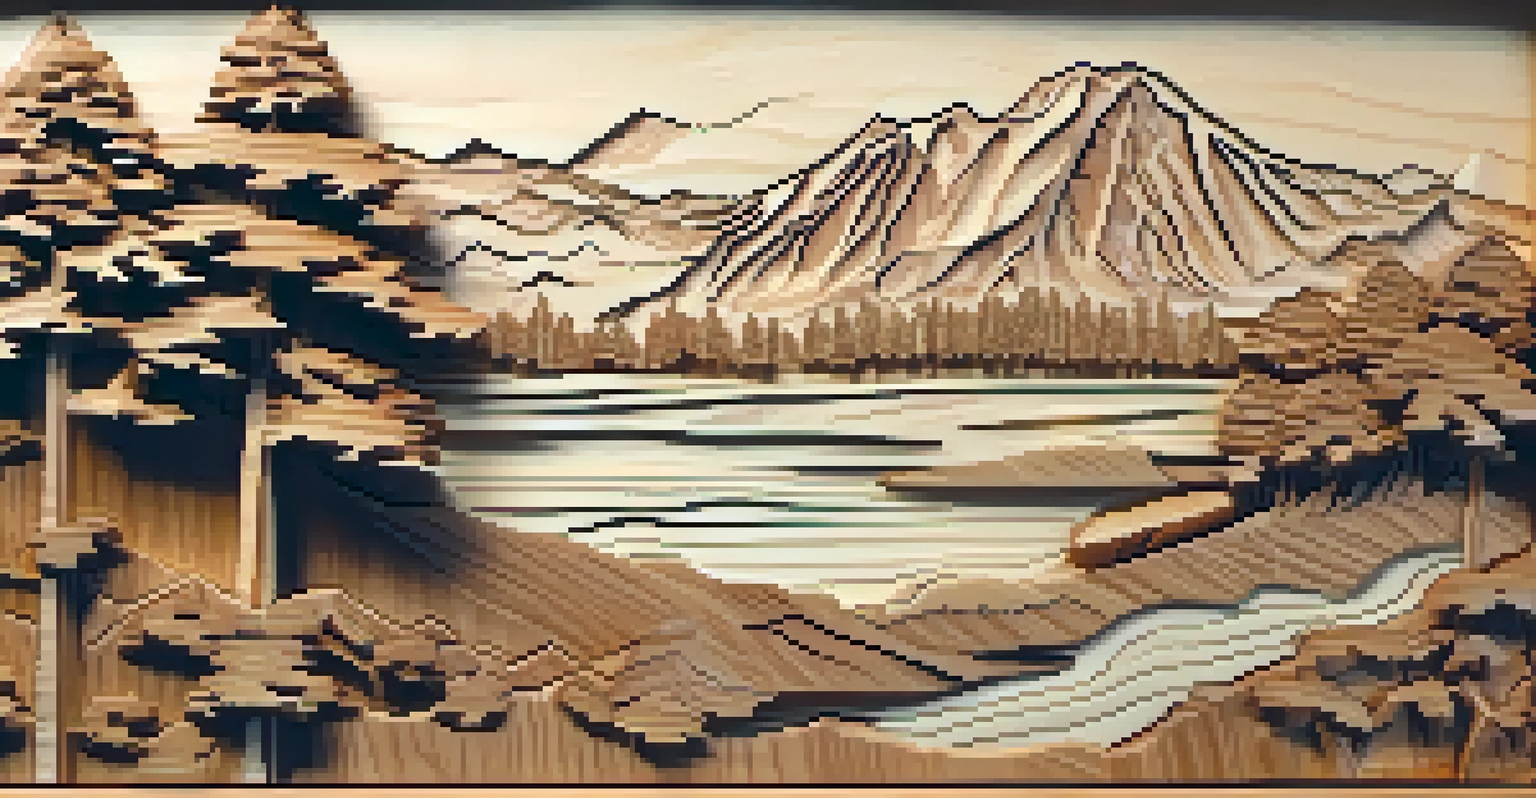
Relief carving is a captivating woodworking technique that creates a three-dimensional effect on a flat piece of wood. It involves carving away portions of wood to create raised designs or images, adding depth and visual interest. This form of art allows woodworkers to express creativity while enhancing their skills.
Every artist dips his brush in his own soul, and paints his own nature into his pictures.
The beauty of relief carving lies in its versatility; you can create anything from intricate floral patterns to detailed landscapes. Whether you’re a beginner or an experienced woodworker, tackling relief carving can be a rewarding experience. Plus, it offers a unique way to personalize gifts or home decor.
Related Resource
Furthermore, relief carving can be a meditative process, allowing you to focus on the task at hand while honing your craft. As you delve into this art form, you’ll discover not only the joy of creating but also a deeper appreciation for the beauty of wood.
Essential Tools for Relief Carving
Before you start your relief carving journey, it's crucial to gather the right tools. Some essential items include carving knives, gouges, chisels, and a mallet. Each tool serves a specific purpose, making it easier to achieve detailed designs and smooth finishes.
For beginners, a basic set of carving knives and a few gouges should suffice. As you progress, you might want to invest in specialized tools that cater to your specific projects. Always remember, quality tools can make a significant difference in your carving experience.
Relief Carving Enhances Creativity
This woodworking technique allows artists to create stunning, three-dimensional designs while honing their skills.
Additionally, having a sturdy workbench and a secure vise will help stabilize your wood while you carve. This setup not only enhances safety but also allows for greater precision and control as you work through various designs.
Choosing the Right Wood for Relief Carving
Selecting the appropriate wood is a vital step in achieving successful relief carving. Softwoods like basswood or pine are popular choices for beginners due to their ease of carving and smooth grain. They allow for finer detail without excessive effort, making them ideal for intricate designs.
The only way to do great work is to love what you do.
On the other hand, hardwoods such as oak or cherry offer durability and a beautiful finish but can be more challenging to carve. If you're an experienced woodworker, experimenting with different types of wood can yield unique results and textures in your carvings.
Related Resource
Always consider the grain direction and any knots in the wood, as these can affect your carving process. Proper wood selection not only improves the workability of your project but also enhances the overall aesthetic once completed.
Planning Your Relief Carving Project
A successful relief carving begins with careful planning. Start by sketching your design on paper, ensuring that it fits well within the dimensions of your wood piece. Having a clear vision helps guide your carving process and keeps you focused on your end goal.
Once your design is finalized, transfer the sketch onto the wood using graphite paper or a light pencil outline. This step is crucial, as it serves as your roadmap while carving. Remember to keep your lines clear and simple, especially if you're just starting out.
Essential Tools are Key
Having the right tools, like carving knives and gouges, is crucial for achieving detailed designs and smooth finishes.
Additionally, consider creating a small test piece before diving into your main project. This allows you to practice your techniques and get a feel for how your tools interact with the wood, ultimately boosting your confidence and skill level.
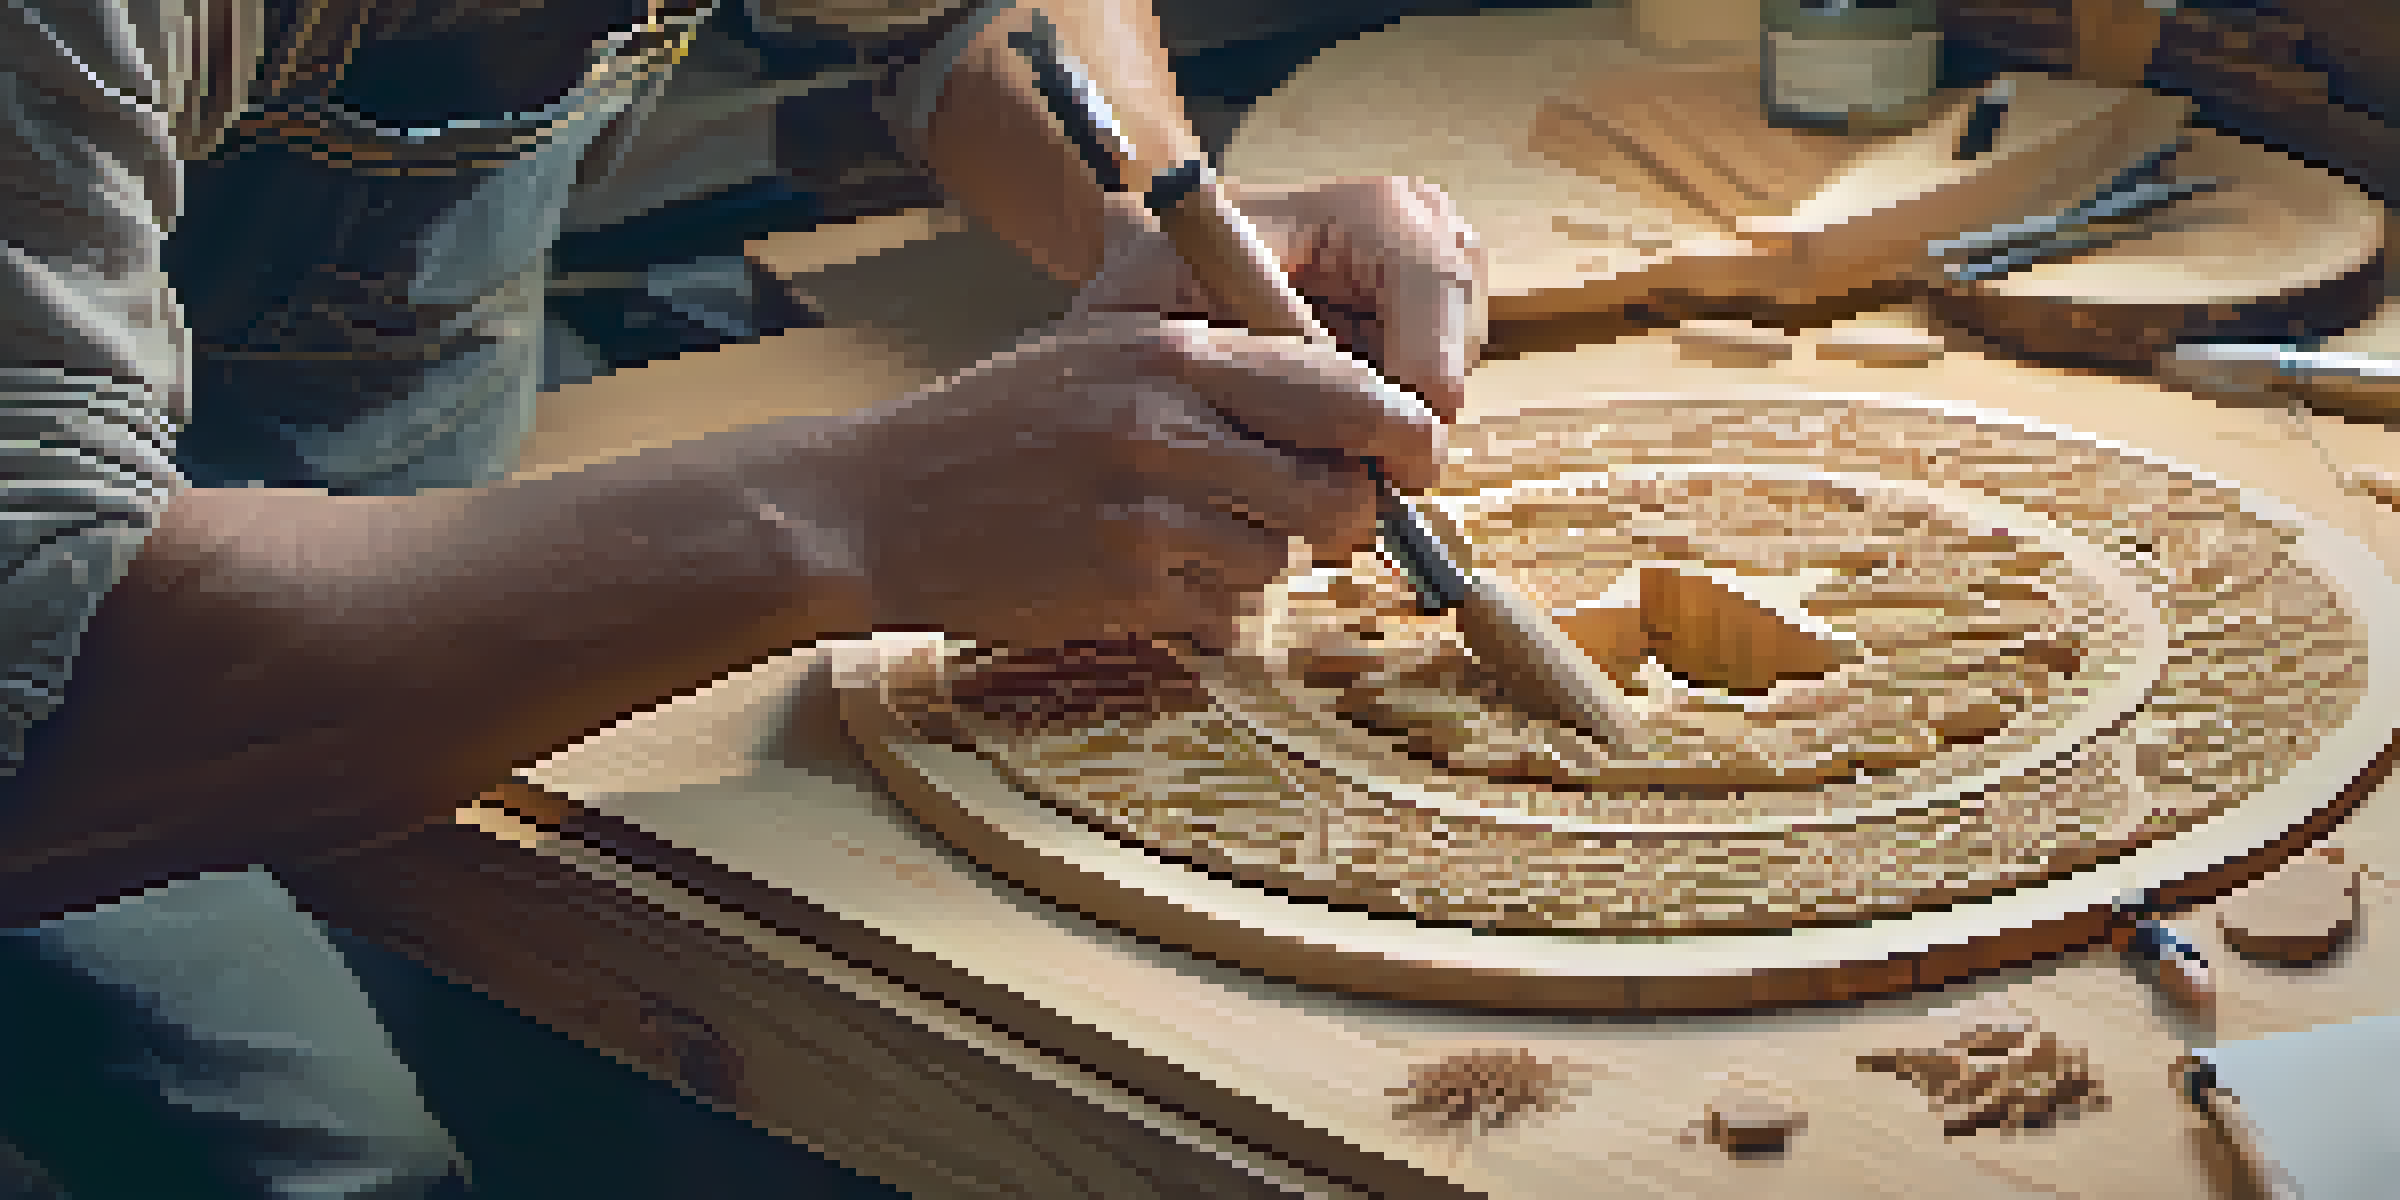
Step-by-Step Relief Carving Process
Now that you're prepared, let's dive into the actual carving process. Start by outlining your design with a small carving knife, carefully following your transferred lines. This initial cut creates a guide for deeper cuts, ensuring accuracy as you progress.
As you move on, use your gouges to gradually remove wood from the background, allowing your design to pop out. Focus on working in layers, removing small amounts of wood at a time to avoid mistakes. Patience is key here, as rushing can lead to unwanted errors.
Related Resource
Throughout this process, take time to step back and assess your work frequently. This perspective will help you maintain balance and proportion in your design, ensuring that the final piece is both visually appealing and well-crafted.
Finishing Touches: Sanding and Sealing Your Carving
Once your carving is complete, it's time to give it a polished look. Start by gently sanding the surface to smooth out any rough edges and enhance the details of your design. Use progressively finer grits of sandpaper to achieve a professional finish that feels good to the touch.
After sanding, consider applying a wood finish or sealant to protect your carving and enhance its natural beauty. Options like mineral oil, polyurethane, or beeswax can provide a lovely sheen while safeguarding against moisture and wear.
Choose Wood Wisely for Success
Selecting the right type of wood, such as softwoods for beginners, greatly impacts the carving process and final outcome.
Remember, the finishing touches can significantly impact the overall appearance of your carving. Take your time during this stage, as a well-finished piece reflects your dedication and skill as a woodworker.
Tips for Continuous Improvement in Relief Carving
As with any craft, practice makes perfect. The more you carve, the more you'll understand the nuances of your tools and materials. Don't be afraid to experiment with different styles and techniques to discover what resonates with you.
Joining a woodworking community or taking classes can offer invaluable insights and feedback. Engaging with fellow woodworkers allows you to share experiences, learn new tricks, and gain inspiration from others' work. Remember, every artist has their unique journey.

Lastly, embrace mistakes as learning opportunities. Each carving, whether a success or a setback, contributes to your growth as an artist. Keep pushing your boundaries, and you'll find yourself continually evolving in this beautiful craft.